 In this tutorial I’m going to explain the basic steps to create this simple Sea Turtle artwork. My sea turtle was burned on watercolor paper. I created the turtle for another project I was working on that I needed a turtle cut out. That is why there isn’t a background or other objects in my artwork; squiggly lines in the lower left corner not counting.
To watch a YouTube video version of the tutorial click on this link: https://youtube.com/shorts/pdZ0JYIsjMM The video is a shorts video, so it has a vertical orientation and is less than three minutes long.
The explanation in this blog will be fairly basic. The main reason for that is because I no longer have unlimited picture capabilities. I highly recommend watching the video to get a better idea of what I’m trying to explain.
Now, let’s get started.
 Here’s are some patterns for sea turtles. I found some images on the internet and did a quick outline of them. I did not keep track of which photos I used since I wasn’t going for hyperrealism.
STEP 1 – PREP THE SURFACE
PAPER
I am burning on watercolor paper, so the only prep is to secure the paper to a heat safe ridged backing board. I place tape along all of the paper’s edges to prevent the paper from buckling while I burn.
WOOD
If you are burning on wood, then I highly recommend the following 4 steps.
 1) Smooth the wood surface by sanding it with at least 220 grit sandpaper.
 2) Thoroughly wet the board by misting it with water or running it quickly under the sink faucet.
 The board should be damp to the touch, but not soaking wet.
3) Let the board dry.
4) Sand again with 220 grit sandpaper.
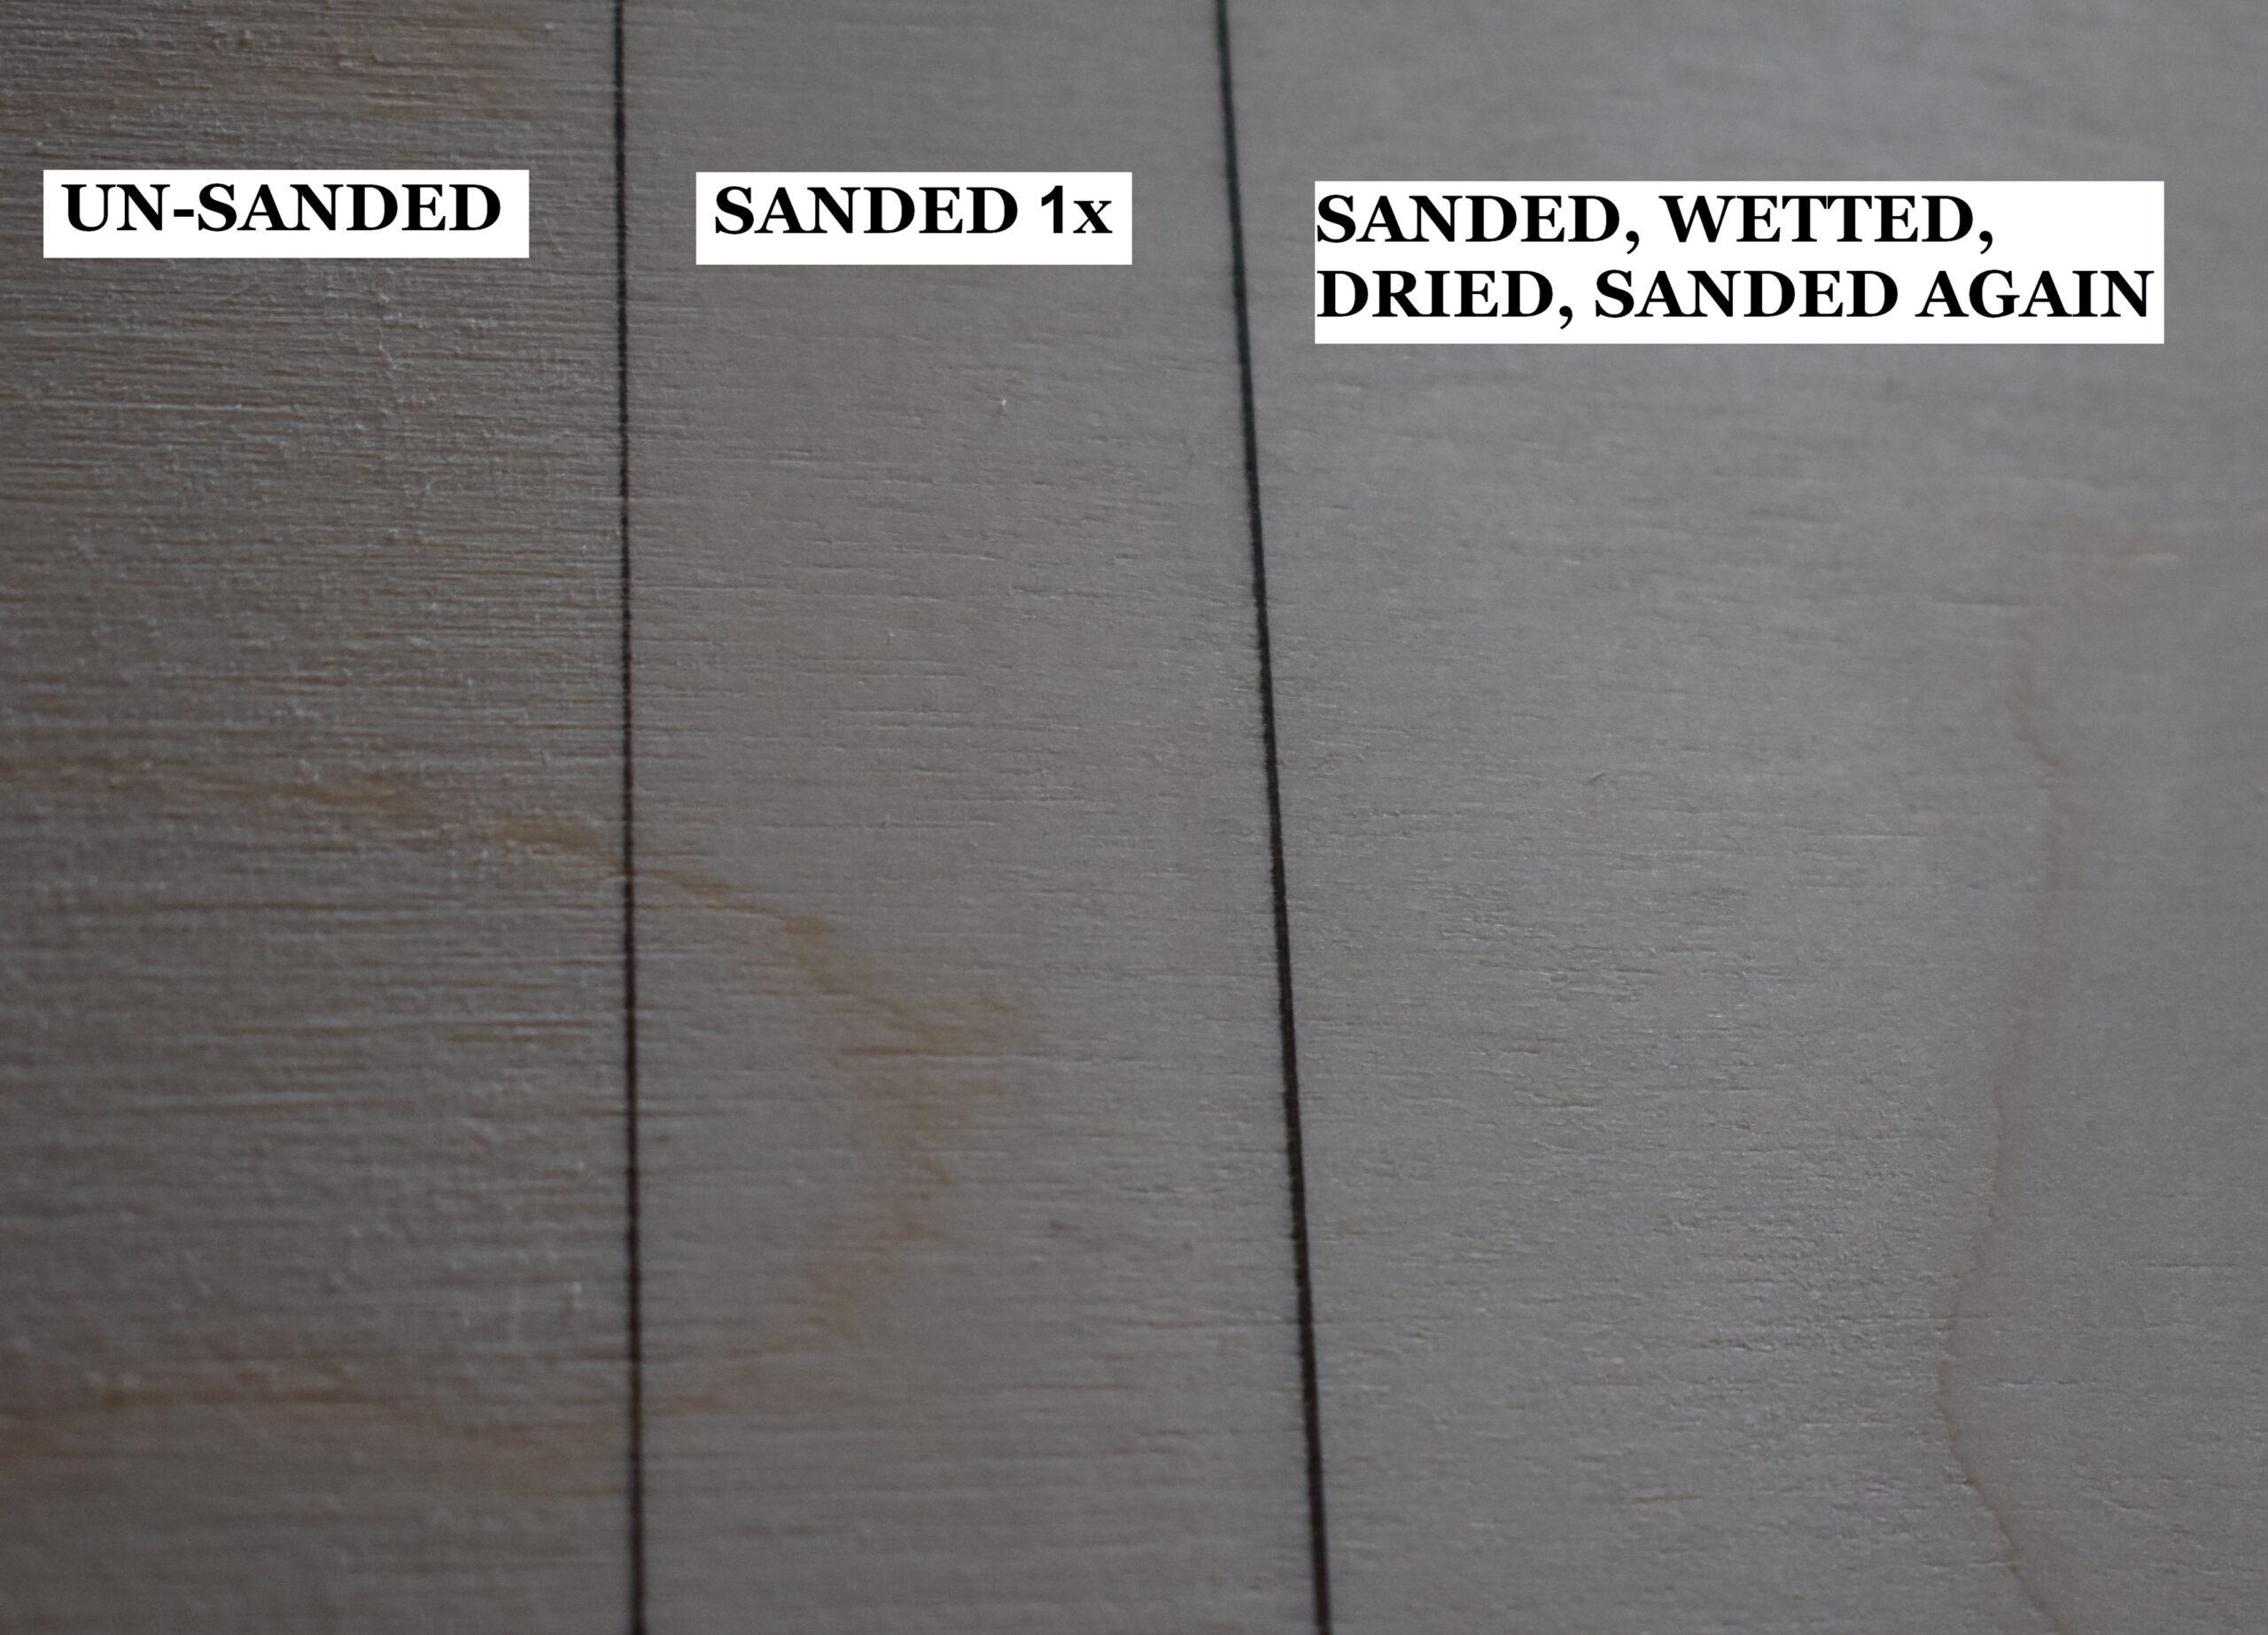 This piece of plywood board is broken up into three sections. The far-left section is how the board looks without any prep work. The board has a rough texture. The middle section of the board shows how it looks after it was sanded, and the surface is a lot smoother. The right section of the board shows it after it was lightly misted with water and allowed to dry. Notice how rough the board looks, but a quick sanding will remove that and leave an ultra-smooth board.
Doing the 4-step process (sand, mist, dry, sand) produces a super smooth surface, and the smoother the surface is the better the burn results will be.
STEP 2 – PYROGRAPHY
 Burn over the trace lines, then rub over the area with an eraser to remove excess graphite. Afterwards, use a writer nib and burn dark lines along each section of the outer shell. There should be a white gap of unburned wood between each section.
My artwork is very small (1 ½ inches long or 3.8 cm), so I’m using a micro writer nib. I do have a video that explains how to transform a standard writer into a micro writer. Here’s a link to that video: https://youtube.com/shorts/6SvPPAj0cVA
 Then fill in each section using a writer.
Keep in mind that the nib you should use is dependent on the size of your artwork. Since my artwork is so small a shader wouldn’t fit.
As you burn, make sure to avoid burning over the white gap.
 Now burn a dark line around each section on the main portion of the shell.
Again, there should be a white gap of unburned wood around each section.
 Here’s how the turtle looks so far.
If you look at the small outer sections of shell, you can see that the line I burned around each section is darker than the rest of the section. I actually like how this looks. If you prefer, you can make the line and fill in the same color.
 Next, burn in the spots and markings on the face.
 The burn some thin tan lines that follow the contours of the shell on the neck. This will create the appearance of wrinkled skin. Maybe a better term would be skin folds since I think the lines are there because the neck is not extended fully.
 Burn oblong shapes on the front flippers. You can burn as many or as few as you want.
The only thing I recommend is that you burn both flippers in a similar manner.
 Repeat the process on the back flippers.
Again, the only thing I recommend is burning both flippers in a similar fashion.
The markings on the flippers to not need to be exact. Let’s face it, no one is going to compare them that closely. This is true for both the front and back flippers.
 Use a small shader and burn along the outer edges of the turtle head to give it a 3d appearance.
 Burn over all of the flippers so that they are a tan color. Reburn over the lower portion of the front flippers, and the inner portion of the hind flippers to create a slight shadow and 3d appearance.
 Before we start on the main portion of the shell, I to want to mention that you can use the tip of a sharp knife to remove any lines that were accidently burned on the white gaps. Make sure you use a light hand pressure when scrapping. You want to remove color, not gouge the wood.
 Now burn pull away strokes along the edges each section on the main portion of the shell.
Here are some tips to get better results.
1) Burn so you are pulling the nib down towards yourself. Burning in this direction makes it easier to control.
2) Always start the burn stroke on an edge.
3) Pull the nib towards the opposite edge.
4) Lift the nib quickly up from the board near the end of the burn stroke. This will create gradient color.
5) Reburn. I reburn over the area several times to build up the color. When I reburn, I make sure my burn strokes are not exactly on top of previous burn strokes. To put that another way, my burn strokes overlap each other.
6) Don’t burn at a high heat. The higher the heat is, the harder it is to control the burn results.
7) Rotate the board as needed to make burning easier. Preferably in a direction so that you can pull the nib down towards yourself.
 I like to burn all of the edges that I easily can with the board orientation.
 Then I rotate the board and burn along edges that are easy to do with that orientation.
 Again, the tip of a sharp knife can be used to gently scrap away any burns that accidently overlapped onto the white gap.
 Make sure to rotate the board as needed while burning.
I do want to mention that I did not burn over the gaps between the sections on the shell. The gaps are very thin on my artwork, so I didn’t think it was needed. That said, if you think the gaps are too bright on your artwork, then burn the gaps to a tan color.
 Here are the three turtles I burned. After they were burned in, I cut them out to use in my other project.
 This is my other project; mini wall hangings featuring a sea shore scene.
What will you do with your sea turtle(s)?
IN CONCLUSION
I hope you found this tutorial fun and easy to follow along with.
Until the next blog,
Brenda
May 27, 2026
Want to subscribe?
- Click on the “Leave a Comment” field at the end of any post (blog) and a subscribe option will appear.
- Put something in the comment field (if you put “test” or “just subscribing” I won’t make your comment public)
- Fill in the sections for your email address and name, and then click on the “notify me of new posts via email.”
- You will get a confirmation email from WordPress confirming you want to subscribe.
- Click on the confirm button in that email and you’re done.
Please note that I do not send out emails. If you have a WordPress account there is a way to subscribe within the WordPress system, but I cannot provide specifics on how it works as I don’t know.